How to package fonts in .msi file for easy deployment
In this tutorial I will show you how to package custom font(s) into a Windows Installer .msi package for easy deployment to computers in a network through Active Directory. Alternatives is to use a VBscript solution or batch file solution, but I like this solution better as it allows me to deploy it through a AD group policy, it will automatically ensure that the fonts is only installed once, and should I ever want to remove the fonts from all the computers again, it is just a matter of updating my AD group policy. The Windows Installer technology handles the rest.
Lets get started …
Step 1: Install the font you want to distribute on your own computer, using the regular method through the Control Panel. This will create all the required registry entries that we will need later. In this example I will be using the Judson fonts by Daniel_J. The font files are named: Judson.otf, JudsonBold.otf, and JudsonItalic.otf.
Step 2: Open up regedit.exe and navigate to follow registry key and export it (save as e.g. judson-fonts.reg):
HKEY_LOCAL_MACHINE\SOFTWARE\Microsoft\Windows NT\CurrentVersion\Fonts
Step 3: Open the exported registry file (.reg) and remove all references to fonts others than the ones you want to install. Your exported registry file (.reg) should look something like this when you are done (your font names replaced with Judson of course):
Windows Registry Editor Version 5.00
[HKEY_LOCAL_MACHINE\SOFTWARE\Microsoft\Windows NT\CurrentVersion\Fonts]
"Judson (TrueType)"="Judson.otf"
"Judson Bold (TrueType)"="JudsonBold.otf"
"Judson Italic (TrueType)"="JudsonItalic.otf"
Now you are ready to create the MSI installation package.
Step 4: Download and install the freeware version of Advanced Installer and open the program.
Step 5: In the New Project dialog box select the Simple template in the Generic Templates section. Make sure to uncheck the Use wizard to create the project checkbox before clicking on the OK button.
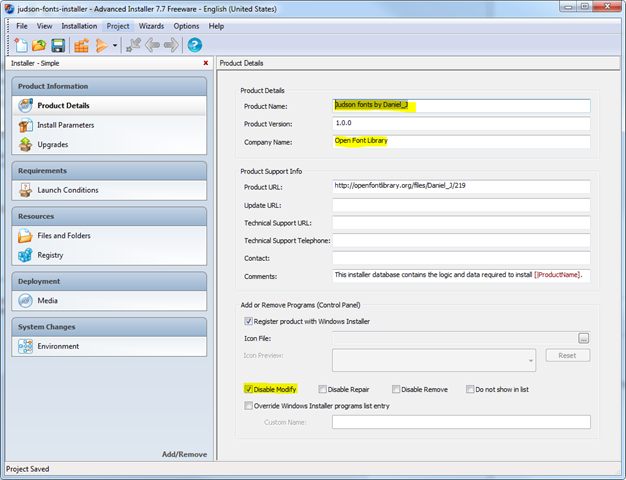
Step 6: This will show you your new empty project with the Product Details page displayed. Fill in the appropriate fields like Product Name and Company Name, and check the Disable Modify checkbox. Checking the check the Disable Modify checkbox is not strictly necessary, but since we do not allow the user to modify the installed fonts after the initial installation anyway, there is no reason to confuse them with the option.
===
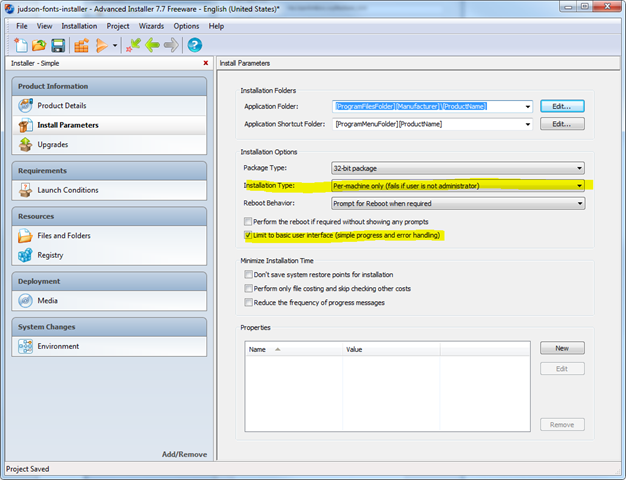
Step 7: Now select the Install Parameters page and change Installation Type to Per-machine only (fails if user is not administrator). Also check the Limit to basic user interface (simple progress and error handling) checkbox. The Application Folder and Application Shortcut Folder fields can be ignored since the installer will not create the folders when no files have been added to them.
===
 ===[Step 7]
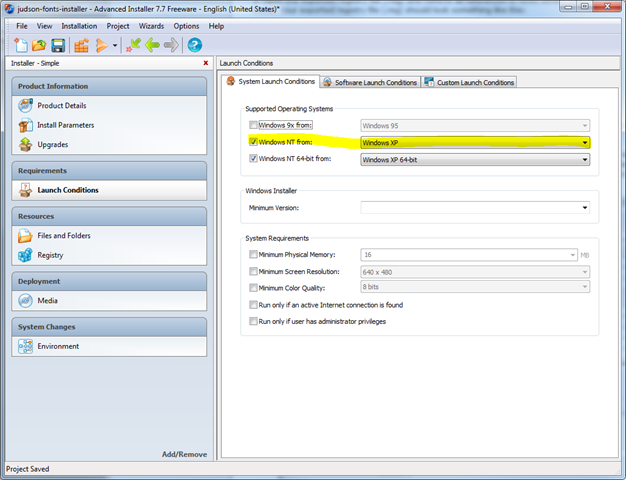
Step 8: Now select the Launch Conditions page and change Windows NT from to Windows XP.
===
Now we are ready to add the fonts files to the .msi package.
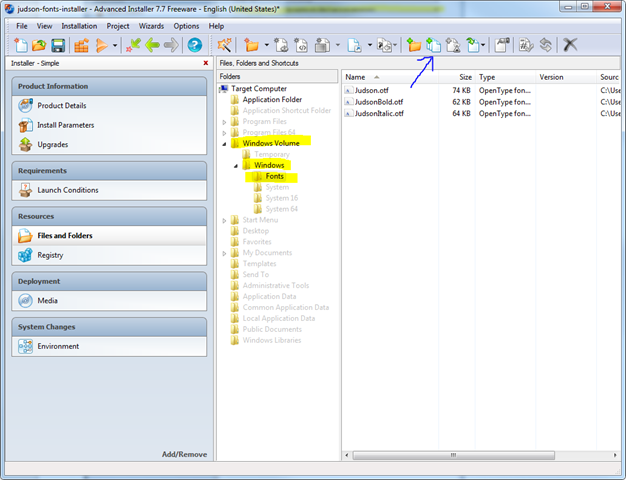
Step 9: Switch to the Files and Folder page and navigate the Target Computer tree down to the Fonts folder (Windows Volume -> Windows -> Fonts). With the Fonts folder selected, click on the Add Files button to add the fonts you want to install. In my case these are Judson.otf, JudsonBold.otf, and JudsonItalic.otf.
===
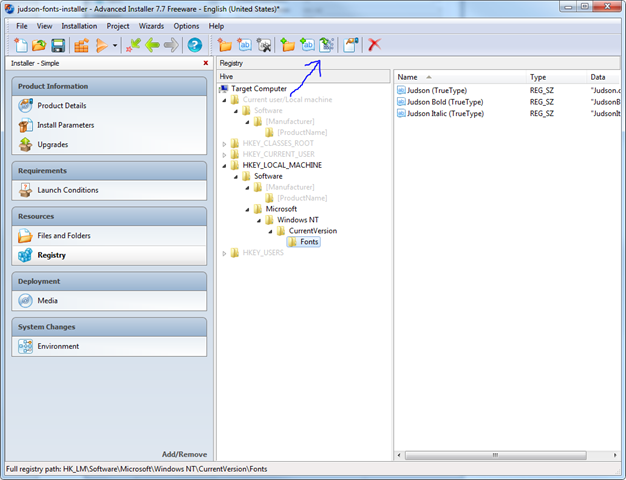
Step 10: Change to the Registry page and click on the Import REG file button, to import the registry file you created in step 2 and modified in step 3. This will the registry entries needed to install the fonts on a computer.
===
Step 11: If you haven’t already saved your project, do so now. I named my project judson-fonts-installer. With the project saved, go to the Project menu and select Build. This will build the .msi file and you are now ready to deploy the fonts to your users.
Comments